
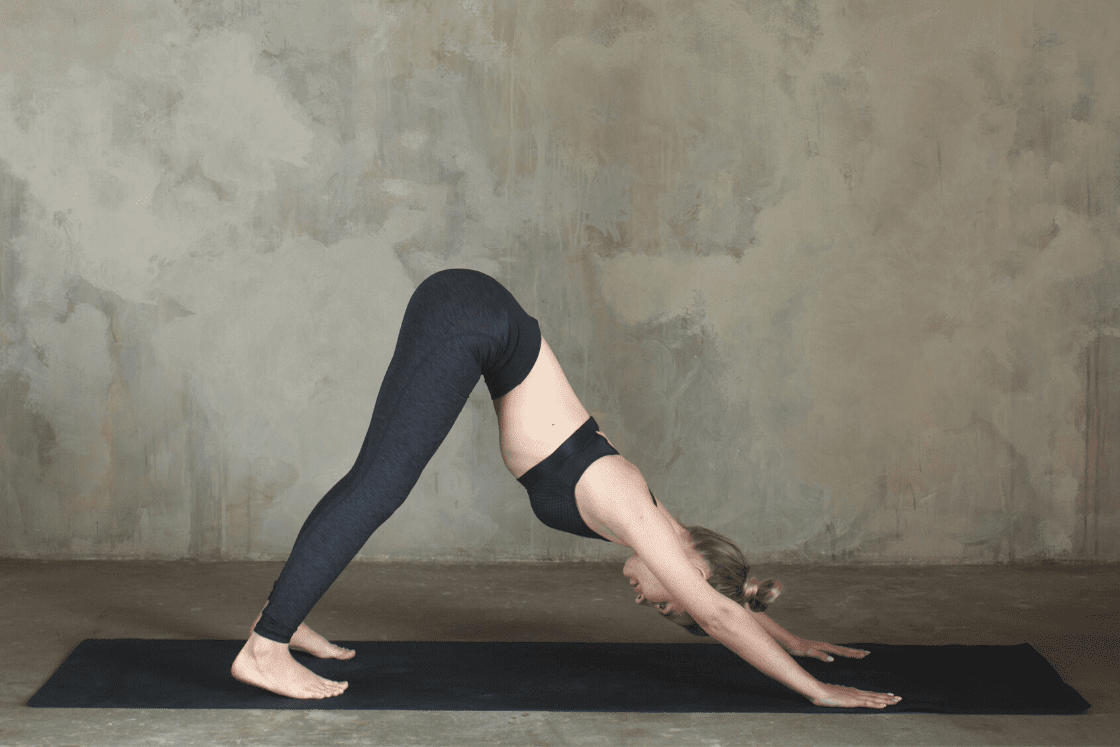
Adho Mukha Svanasana
Traditionally, this asana is believed to activate a number of the chakras, including the Manipura and ajna chakras. Activating the Manipura chakra through adho mukha svanasana is thought to dispel fear and insecurity, while the ajna chakra stimulates perception and inspiration.
As an inverted pose, adho mukha svanasana gets blood and body fluids flowing in the opposite direction by reversing the action of gravity. Inversion is also thought to provide a different perspective on an emotional level, boosting confidence.
Meaning of Adho Mukha Svanasana in Sanskrit
Adho Mukha Svanasana (AH-doh MOO-kah shvah-NAHS-ah-nah)
Adho = downward
mukha = face
svana = dog
Due to pollution average life of people decreased by 9 years
Some special tips for beginners
- It’s more important to keep length in the spine than straight legs. So if you are rounding in your back or hunching your shoulders, it’s fine to keep the knees bent as much as you need to so you can enjoy the stretch in your back. And remember your heels don’t need to touch the floor!
- The spiral action of the arms can be tricky at first so try it while you are sitting on your heels.
- You can work on the pose by practising against a wall. Stand facing the wall about a meter / 3 feet away with your legs hip distance apart. Place your hands on the wall (use the same arm rotation as in the steps above). Walk your hands down the wall until your torso and arms are parallel to the floor.
How to do Adho Mukha Svanasana
Step 1
For getting into the pose, come into a table-top position. This position can be achieved by balancing the body onto your knees and wrists such that the two knees and the two wrists form the leg of a table while the rest of the body is the top.
Step 2
While keeping your toes firmly on the ground, gently lift your knees upwards. Do so while exhaling.
Step 3
Stretch your arms forward so that the upper body is tilted towards the front. Keep your palms inward, while maintaining the alignment with the respective shoulder.
Step 4
Move deeper into the yoga by lifting the knees as high as the hip can be. Your body should ideally form an inverted V shape. Maintain the curve on your back inwards. It should not protrude outwards at any point while performing the pose. Keep the head and neck aligned while your ears can gently graze either shoulder.
Step 5
Push the tailbone as much as you are comfortable with. This is done to provide ultimate stretch to the body, especially the back and calves. Remain in the position for a duration of 15-20 breaths.
Step 6
Reach back into the tabletop position while gently exhaling and bending back the knees. Repeat the pose up to 8 times.
Know about Dhanurasana its benefits and precautions
Benefits of Adho Mukha Svanasana
- Helps restore body energy and revitalizes it.
- Renders tone to the calves, back, and hip muscles.
- Improves lung capacity.
- Reduces anxiety and depression.
- Improves memory and enhances cognitive skills due to improved oxygen supply and blood circulation to the brain.
- Strengthens and lengthens the spine. Relieves any discomfort or pain in the middle and lower back.
- Stretches the entire body while strengthening arms, calves, and shoulders.
You can Modify it according.
If you have very tight hamstrings, you may not be able to keep your butt high and straighten your legs at the same time. If that’s the case, it’s okay to keep a slight bend in your knees. Your hamstrings will lengthen over time with the consistent practice of other poses.
You can place a yoga block under your head to do a restorative version of the pose. For greater comfort, you can also use a block under your hands or a folded towel under your wrists.
Know about Halasana its benefits and precautions
Precaution during Ashana
It is best to consult a professional trainer or medical practitioner before you do this asana. Avoid practising this asana if you suffer from
- Carpal tunnel syndrome
- High blood pressure
- A detached retina
- A dislocated shoulder
- Weak eye capillaries
- Diarrhoea
Conclusion
Adho mukha svanasana is a forward bending type of position. It may help stretch the muscles of the legs, hands, calves, and inner thighs. This is a rejuvenating pose. It might help strengthen the muscles and improve the blood supply to the brain. Even so, you may avoid this asana if you feel pain in the body while practising it; kindly consult the doctor.